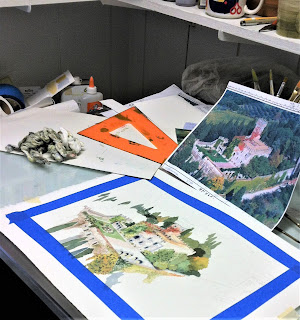
Bald Head Island looks like such a beautiful place. A bride recently commissioned me to paint a watercolor of the Village Chapel where she was married. I absolutely loved creating this painting for her because I absolutely loved the photos she sent me of the chapel!
Wednesday, July 6, 2022
Village Chapel of Bald Head Island, NC
After many discussions concerning the view we liked, this is the one we selected. We also discussed the details she would like to include and she asked that it be 18 X 24 inches in size. After I completed the drawing, I began to add in the color, starting with the surrounding trees. Once I got started I was so interested in the painting process I actually forgot to take pictures or video! The only photos I have to show you are when the painting was almost completed!
Thanks for visiting today! Hope to see you again next Wednesday for another watercolor post.
Follow me so I can let you know what I will be posting.
Have a Happy Day!
Carole
Follow me on Instagram! @carolepoolegallery
Wednesday, February 24, 2021
A Splendid Italian Wedding Invitation
I might call this post Throw Back Wednesday! Because this painting is one that I produced quite a few years ago. It came back to the forefront when another customer asked for something similar and I showed her this work... A custom watercolor of the wedding venue created as a gift to the groom from the bride. The painting was then reduced in size to use as a part of the wedding invitation. How amazingly wonderful!
Castello di Vinciglevate is a restored castle nestled in the foothills of Florence Itlay. It was to be the wedding venue for my client! The bride designed the invitations with a smaller print of my painting in the background. It was such a creative and beautiful idea. Each invitation was so customized.
The original painting was then framed as a wedding gift for the groom to hang in their home to remember their special day for many years to come.
The Painting Process...
I began with a drawing, adding as much detail as possible. And there was a lot of that!
Then I brought on the watercolors and began the painting process.
It's almost done here! Just a few more sections and it was ready for shipping!
Complete!
What a joy it was to work with the bride on this project. She was such a lovely person and I loved seeing the pictures of the wedding. Nothing but sweet memories! Thanks so much for dropping by today. I'll be here with a new painting every Wednesday. Hope to see you!!!
Wednesday, June 19, 2019
Heavenly Hydrangeas!
Painting reference:
After lightly sketching the flowers, I added the first layer of color and let it completely dry before adding the next layers. (Above)
I continued glazing and adding layers of lavender and blue, plus I started the green leaves. (Left)
Once I began adding the dark background, the florets begin to take shape. Especially in the areas between the petals. (Below)
I hope you'll take time to seek out some beautiful flowers to paint this summer. They only last a short time. So by preserving them using paint and paper, you can enjoy them for years to come.
And, think about it, you can change the colors of your hydrangeas using paint much easier than changing the soil nutrients!
Easy Peasy!
Enjoy my tiny video below of one of our hydrangea bushes in the garden. Love 'em. Love 'em, Love 'em!
Happy Painting! Carole
Wednesday, May 22, 2019
An Italian Villa
A sweet couple that I know well recently commissioned me to paint an Italian Villa that they stayed in while touring Italy. It was to be a thank you gift to the friends who invited them to stay in the villa. It's a lovely place nestled in the hills among orchards and vineyards. I loved painting it for them and was so happy they liked the end result. Here are some of the steps I took to create the watercolor they asked for... using pictures they had taken while they were there.
After a light drawing, I began the process with watercolor washes to determine
the composition and place the main features
I continued to add washes and began to find areas to add in the darks.
This helped to create depth and make certain areas stand out.
As I continued to add landscape, distant mountains and sky features,
the painting slowly began to take shape.
From this point, details became important. This is my favorite part!
Adding details and darks, I continued to glaze in the layers and add shadows.
Suddenly, it began to come alive!
I continued the painting until I felt it was complete. Sometimes, it's actually hard to know when all of the steps are done. It's something an artist faces each time they take on a painting. It's always best not to over paint. Most of the time, watercolors are best left understated.
But this time...I knew when it was finished. It just told me!
It was complete and ready to ship directly to the homeowners. Their Italian Villa!!!
Thanks for dropping by...I try to post as often as I can, and lately that hasn't been too often!
But here's to more posts in the future!
Carole
Wednesday, April 24, 2019
Condo in Chicago!
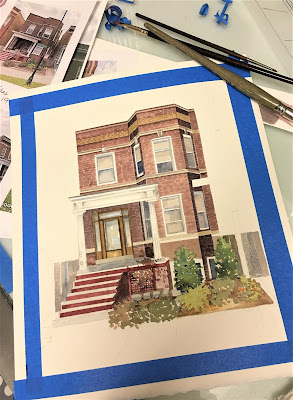
Many times I am asked by real estate agents to create a painting of a house they have sold to a special client. It's such a wonderful gift for their clients and I always love being a part of it. This condominium in Chicago is a example of one of those gifts.
Today I'm posting just a quick little sample of the steps I took to create this watercolor.
After completing the drawing I began the main bricked portion of the house and simple greenery.
Continuing with the bricks, I added shading to create perspective and interest.
Next I added the details on the steps and door and completed the greenery around the house
Adding the sky, surrounding fencing, steps and sidewalk, details on the door, windows
and street sign completed the painting.
It was then packaged and shipped to the agent to make the presentation to the client at the closing!!!
Thanks for joining me today. Email me if you have any questions....
See you again on Wednesday!!!!
Carole
Wednesday, January 2, 2019
Misty Mountain!
This mountain retreat in Washington was the perfect home for a watercolor!
I especially loved the mist rising behind the house. I really took my time and
enjoyed getting to know the lodge and it's grand surroundings.
I stayed as close as possible to the photograph while drawing and painting this one.
There wasn't one thing I didn't LOVE about the picture the owner sent me!
As a matter of fact, I was so absorbed in the painting process, I forgot to take pictures.
I only have a few but will post them to let you see how I started out.
A little closer view of the photo above. As you can see, I started with the trees and shrubs and
then went to the roof. I waited until the very end to tackle the misty mountainside.
I kept adding details and finalizing the house before adding the mist.
When I'm laying down a wet wash, I have to work quickly before it dries.
This mist was the perfect example of that and I couldn't put down the brush to take more pics.
But at least there's one!
But at least there's one!
But you can see how the mist within the trees turned out. It actually took me much less time
than I had thought it would. I really had to be careful not to overwork it.
And...here is it!
Thanks for dropping by and please come back soon.
Try to pick up a brush this year. Let me know if you're considering watercolor and
I would be happy to give you some beginner tips.
Happy New Year to each and everyone!
Carole
Wednesday, December 12, 2018
A Cabin in the Snow!
This painting was really fun to do! A client contacted me about painting this sweet mountain cabin for a friend. What a wonderful gift! I was so involved with "being in the moment" that I almost forgot to take pictures along the way! So here are the only pics I took in the process of this painting.
"A Winter Wonderland"!
First comes the drawing
Adding washes to define the surroundings
Adding light washes to the cabin
Adding the details
Darkening the details
The Final Painting!
Loved sharing with you.
Join me again next Wednesday!
Carole
Follow me on Instagram!
Adding light washes to the cabin
Adding the details
Darkening the details
The Final Painting!
Loved sharing with you.
Join me again next Wednesday!
Carole
Follow me on Instagram!
Subscribe to:
Comments (Atom)

.jpg)


